How to Remove a Car Battery Safely: Step-by-Step Guide
A dead battery light on your dash, a battery that won’t hold a charge overnight, or a repair that requires cutting power to your car’s electrical system — there are plenty of reasons you might find yourself standing in front of an open hood wondering where to start. The good news is that removing a car battery is one of the more approachable jobs in the garage. You don’t need a lift, a scan tool, or years of wrench-turning experience. You need about 15 minutes, a couple of basic tools, and a clear understanding of the correct order to disconnect things.
This guide walks through exactly how to remove a car battery safely, from the gear you should wear to the exact sequence for pulling the cables, to what to do with the old battery once it’s out. It also covers a few situations most guides skip entirely, like how to charge a car battery without removing it, how to free a corroded terminal without snapping a bolt, and how to keep your radio presets and seat memory intact during the swap.
Why You Might Need to Remove a Car Battery
Most people only think about the battery when the car won’t start. But there are several everyday reasons to disconnect or fully remove it:
- Replacing an old or failing battery. Most car batteries last three to five years, though heat, short trips, and heavy electrical loads can shorten that window considerably.
- Long-term storage. If a car will sit for weeks or months, disconnecting the negative cable prevents small parasitic draws — clocks, alarms, computer modules — from slowly draining the battery dead.
- Electrical repairs. Working on wiring, the alternator, the starter, or anything near the airbag system is safer with the battery disconnected, since some components can still carry live current or even trigger with the key out.
- Preventing accidental sparks. Any job where a wrench could bridge metal near the engine bay benefits from a disconnected battery.
- Selling or scrapping the vehicle. Batteries are often pulled and recycled separately from the rest of the car.
The reason changes, but the process is nearly identical. Only the last step — whether you lift the battery out entirely or just tuck the disconnected cable aside — really varies.
Safety Precautions Before You Start
Car batteries look harmless, but they hold a real amount of stored energy and contain diluted sulfuric acid. A short circuit across the terminals can throw sparks, melt a wrench, or in rare cases ignite hydrogen gas that vents off the battery. None of that should scare you off the job — it just means a few precautions are worth taking seriously if you want to know how to safely remove a car battery.
Wear the Right Gear
- Safety glasses or goggles, ideally rated to ANSI Z87.1, to protect against acid splashes or sparks.
- Chemical-resistant or nitrile gloves to keep battery acid and corrosion off your skin.
- No metal jewelry. Remove rings, watches, and bracelets. Metal touching both terminals at once is a classic way to get burned.
Set Up the Work Area
- Park on level ground and set the parking brake.
- Turn the engine off and remove the key, or fully power down a keyless-ignition vehicle.
- Work somewhere ventilated. An open garage door or a driveway beats a sealed garage, since hydrogen gas can accumulate around a charging or discharging battery.
- Keep sparks, cigarettes, and open flames well away from the battery.
Tools and Materials You’ll Need
Most of what this job requires is probably already in your toolbox:
- Wrench or socket set — 10mm is the most common terminal bolt size on U.S. vehicles, though 8mm, 11mm, 12mm, and 13mm show up occasionally
- Battery terminal puller (optional, but useful on corroded posts)
- Wire brush or terminal cleaning tool
- Baking soda mixed with water into a paste, for neutralizing corrosion
- Shop rags or paper towels
- Dielectric grease or anti-corrosion spray, for reinstalling
- A memory saver or small portable power source, if you’d like to preserve radio presets and computer settings
How to Remove a Car Battery: Step-by-Step
This is the core process, and it applies whether you’re swapping in a new battery, prepping the car for storage, or getting ready to work under the hood.
Step 1: Turn Off Everything Electrical
Shut off the engine, headlights, interior lights, and anything plugged into a power outlet. Removing a battery while something is drawing current raises the odds of a spark when you break the connection.
Step 2: Locate the Battery
Most batteries sit in the engine bay, usually near a front corner, under a plastic cover. Some vehicles — including several BMW, Mercedes-Benz, and Chevrolet models — locate the battery in the trunk or under the rear seat instead. Check your owner’s manual if you don’t spot it right away.
Step 3: Protect Your Electronic Settings (Optional but Worth Doing)
Disconnecting the battery resets the clock and often wipes radio station presets, seat memory positions, and adaptive transmission settings. If you’d rather skip reprogramming all of that afterward, plug a memory saver into the OBD-II port — located under the dashboard near the steering column — before touching the cables, or clip a small 12-volt power source directly to the terminals. This keeps just enough voltage flowing to hold the car’s memory while the main battery is out of the circuit.
Step 4: Remove the Negative Cable First
This is the single most important rule in the entire job: always disconnect the negative (–) terminal before the positive (+) terminal.
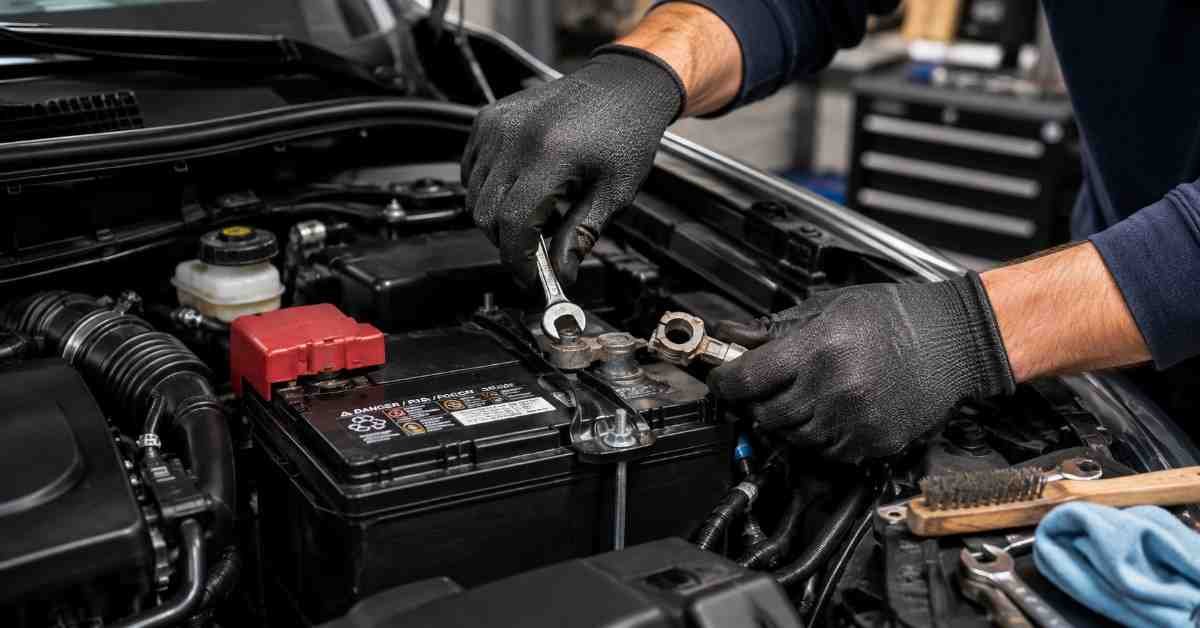
The negative cable is usually black, marked with a minus sign, and connected to the car’s chassis or engine block — its ground point. Loosen the terminal clamp nut with your wrench, turning counterclockwise, and once it’s loose, twist and pull the connector straight off the post. Set it aside where it can’t swing back and touch the terminal.
Doing the negative side first matters because the car’s metal body is already grounded to that terminal. If you remove the positive cable first and your wrench happens to touch any grounded metal while it’s still resting on the positive post, you complete a circuit and create a short. That’s when sparks fly and tools can weld themselves to the terminal.
Step 5: Remove the Positive Cable
Now repeat the process on the positive terminal, typically marked with a red cover or a plus sign. Loosen the nut, then pull the connector off the post. Lay it somewhere it can’t contact metal or the negative cable.
Step 6: Take Off the Hold-Down Bracket
Nearly every battery is secured with a hold-down clamp, bracket, or strap at its base so it doesn’t shift while driving. Use your wrench or a socket extension to remove the bolts holding this in place, and keep the hardware somewhere you won’t lose it — a small parts tray or magnetic dish works well.
Step 7: Lift the Battery Out
Car batteries typically weigh 30 to 60 pounds, so lift with your legs, not your back, and use the built-in handle if there is one. Keep the battery level as you lift to avoid spilling electrolyte, and set it down on a flat, stable surface.
That covers the full process for how to remove a battery from a car. If you’re installing a replacement, reverse these steps: positive terminal first, negative terminal last.
How to Remove a Car Battery Terminal Without Damaging It
Corroded terminals are the most common snag in an otherwise simple job. That white or bluish-green crust building up around the posts is a mix of corroded metal and escaped battery gas, and it can make a connector feel welded in place. Here’s how to handle it without breaking anything:
- Don’t pry with a screwdriver or pry bar. It’s tempting, but this can crack the battery case or bend the post.
- Wiggle, don’t yank. Rock the connector gently from side to side while pulling straight up.
- Use a terminal puller. This inexpensive tool clamps around the post and uses leverage to lift the connector off evenly, without stressing the case.
- Clean corrosion with a baking soda paste. Mix baking soda and water into a thick paste, apply it with an old toothbrush, and let it fizz for a minute before wiping clean. Baking soda neutralizes leftover sulfuric acid residue.
- If a bolt is seized, apply a penetrating lubricant and give it a few minutes before trying again.
Can You Charge a Car Battery Without Removing It?
In most cases, yes — and honestly, this is the more common scenario than a full removal. If your battery is simply low rather than failing, you don’t need to disconnect anything to bring it back up:
- Trickle chargers and battery maintainers connect directly to the terminals while the battery stays in the car. Keep the vehicle off, and only disconnect the negative terminal first if your charger’s instructions recommend it for your specific vehicle, since some newer cars with sensitive electronics prefer that extra step.
- A standard jump start restores enough charge to drive, letting the alternator finish the job. No disassembly required.
- Leave the battery in place whenever you’re only charging it, not replacing it or working near it. Full removal is really only necessary for replacement, storage, or repairs that call for it.
The exception: if the battery is swollen, leaking, or its terminals are severely corroded, remove it before attempting to charge it.
Battery Types Worth Knowing
Not every battery under the hood is built the same way, and the type affects how it handles removal, charging, and replacement:
- SLI (Starting, Lighting, Ignition): The traditional flooded lead-acid battery found in most older and budget vehicles.
- EFB (Enhanced Flooded Battery): A step up from standard SLI batteries, built to handle the frequent cycling of start-stop engine systems.
- AGM (Absorbent Glass Mat): The electrolyte is held in a glass mat rather than sitting as free liquid, which makes AGM batteries more vibration-resistant and better suited to vehicles with heavy electrical loads, like those with advanced driver-assist features.
If your vehicle has automatic start-stop technology, it likely came with an EFB or AGM battery from the factory, and replacing it with a basic flooded battery can shorten its lifespan and affect how the start-stop system behaves.
Common Mistakes to Avoid
- Disconnecting the positive terminal first. This is the single biggest safety mistake and the most common cause of sparks or shorts.
- Letting the loose cable touch metal. Even after it’s off the post, a dangling positive cable can arc if it brushes the fender or engine block.
- Using metal tools across both terminals. Keep only one wrench near the battery at a time, and never let it bridge both posts.
- Forcing a corroded connector. Excess force cracks battery cases and can release acid.
- Skipping eye protection. Acid splashes are rare, but genuinely dangerous when they happen.
- Tossing the old battery in regular trash. It’s illegal in most states and wasteful. Lead-acid batteries are recycled at close to a 99% rate in the U.S. according to the EPA, making them one of the most recycled consumer products in the country.
What to Do With the Old Battery
Once the battery is out, don’t let it sit around indefinitely. Lead-acid batteries are classified as hazardous waste because of their lead content and sulfuric acid electrolyte, but they’re also remarkably easy to recycle responsibly:
- Most auto parts retailers accept old batteries for recycling, often for free.
- Many stores charge a “core charge” when you buy a new battery, refunded when you return the old one.
- Municipal household hazardous waste sites also accept them.
Store a used battery upright, never on its side, and keep it away from open flames or sparks until it’s dropped off.
How to Reinstall a Battery the Right Way
If you’re putting in a new battery, reverse the removal steps:
- Set the new battery in the tray, matching the positive and negative posts to their correct locations.
- Reattach the hold-down bracket so the battery can’t shift while driving.
- Connect the positive cable first, tightening the clamp snugly without overtightening.
- Connect the negative cable last.
- Apply a thin layer of dielectric grease or anti-corrosion spray to both posts to slow future corrosion.
- Start the car to confirm everything is connected properly, then reset the clock and any radio presets if you skipped the memory saver.
Frequently Asked Questions
Which terminal should I disconnect first when removing a car battery? Always remove the negative (–) terminal first, then the positive (+). Reverse the order when reconnecting: positive first, negative last.
Is it safe to remove a car battery myself? Yes, for most vehicles. It’s a routine task that just requires basic hand tools, safety glasses, and gloves. If your battery is in an unusual location, badly corroded, or leaking, it’s worth having a professional handle it instead.
Will I lose my radio presets and clock if I disconnect the battery? Usually, yes, unless you use a memory saver plugged into the OBD-II port or connect a small backup power source to the terminals before disconnecting.
How do I remove a corroded car battery terminal? Clean it first with a baking soda and water paste to loosen the buildup, then use a terminal puller to lift the connector off evenly instead of prying with a screwdriver.
Can I charge a car battery without removing it from the car? Yes. A trickle charger, battery maintainer, or jump start can all charge the battery while it stays in the vehicle. Full removal is only necessary for replacement, long-term storage, or nearby repair work.
What size wrench do I need to remove a car battery? A 10mm wrench or socket fits most U.S. vehicles’ terminal clamps, though some cars use 8mm, 11mm, 12mm, or 13mm hardware. A small socket set covers nearly every case.
How long can a car battery sit disconnected without damage? The battery itself can sit disconnected indefinitely without harm, as long as it’s stored upright in a moderate-temperature spot and isn’t left to fully discharge.
Final Thoughts
Removing a car battery isn’t complicated once you know the sequence: negative cable off first, positive second, bracket out, battery lifted free. The steps that trip people up — reversing the terminal order, forcing a corroded connector, or skipping eye protection — are exactly the ones this guide walks through in detail.
If your battery keeps struggling despite fresh terminals and a full charge, that can sometimes point to a bigger issue with the vehicle itself, and it might be worth reading up on what are the most reliable cars before sinking more money into an aging one. And if repeated battery trouble has you thinking about a new set of wheels altogether, it helps to understand how can you buy a car before you start shopping, so you know what to expect at every stage of the process.